
Upp is a set of business instruments which can be used separately or together.
- Orders: deals and clients management. Data is stored in "Businesses"
- Money: financial accounting. Data is stored in "Wallets"
- Inventory: warehouse and assortment accounting. Data is stored in "Lists"
- Planning: schedules and calendars. Data is stored in "Schedules"
- Docs: invoices, estimates, contracts etc. Data is stored in "Companies"
- Tasks: memos and todos
As you can see on a diagram above, Upp tools are interconnected. For example, you can make financial records within the order (order payment and expenses). Or you can add your order to the schedule.
In this guide we'll uncover the technique of configuring Upp to your business needs. It's quite simple!
Configuration order
Since Upp tools are interconnected, these connections must be configured in each tool settings. We recommend you to create tools in this order:
- Money
- Inventory
- Docs
- Planning
- Orders
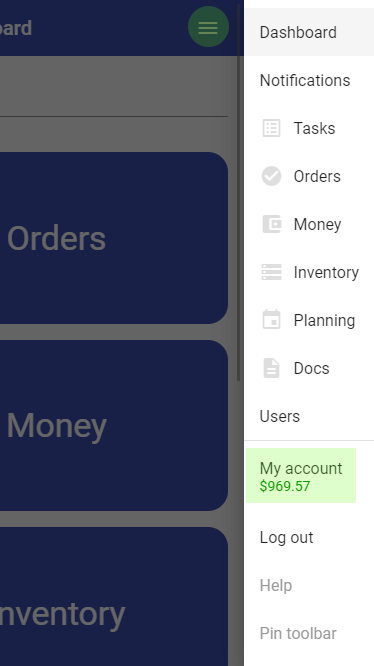
Step 1. Turn on Admin mode and choose required tools
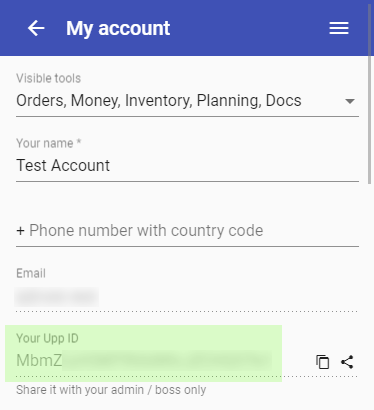
Go to your account settings...
... and turn on the "Admin mode" switch:
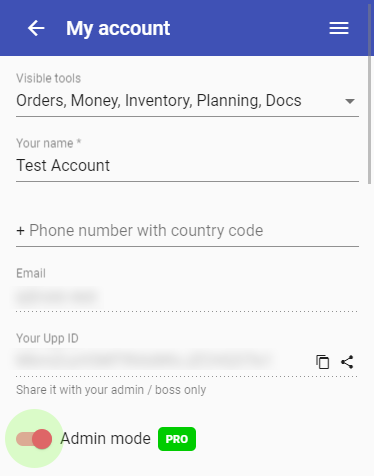
You also should decide what Upp tools you'll use. For instance, if your business doesn't require scheduling, you can disable Planning tool. Edit "Visible tools" field in your account settings:

Step 2. Add users
If you work alone, you can skip this step.
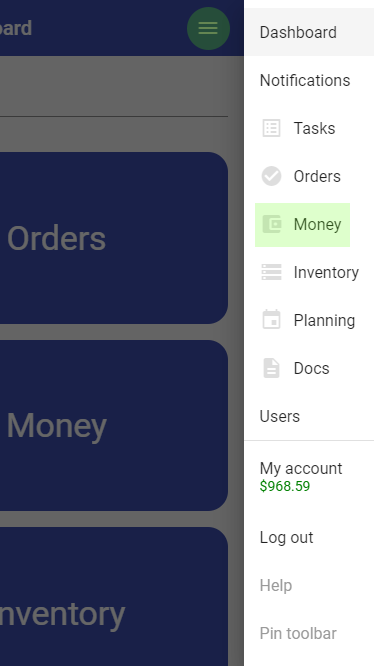
Go to Users menu section...
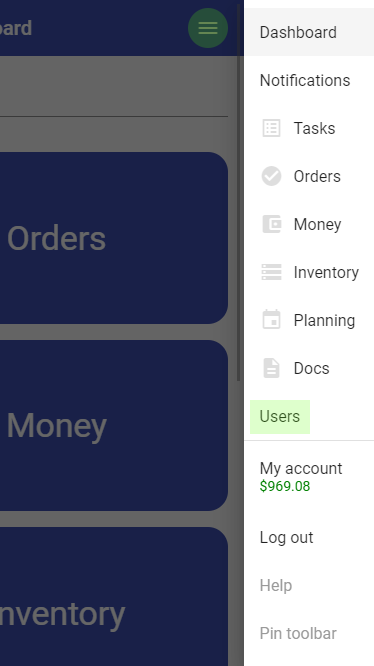
... and add your colleagues:
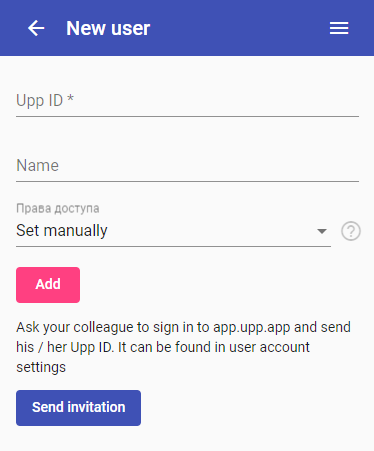
Each user must sign in to Upp app from his device and send you his unique Upp ID that can be found in account settings:
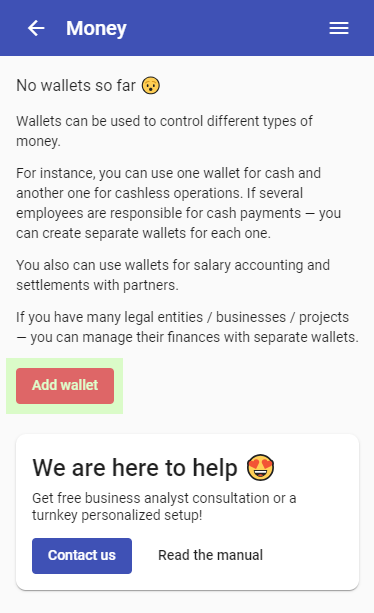
Step 3. Configure Money
Financial accounting in Upp is made with "wallets". Each wallet stores income and expense operations of some kind you want to manage separately. For instance, you can use one wallet for cash and another one for cashless operations. If several employees are responsible for cash payments — you can create a wallet for each one.
Navigate to the Money section in the main menu...
... and press "Add wallet" button:
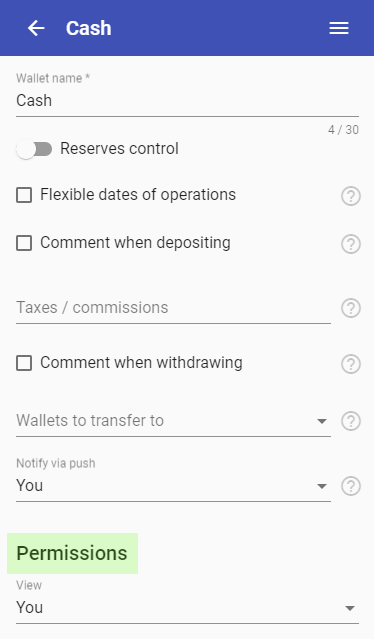
Configure your wallet using tips next to each unclear field:
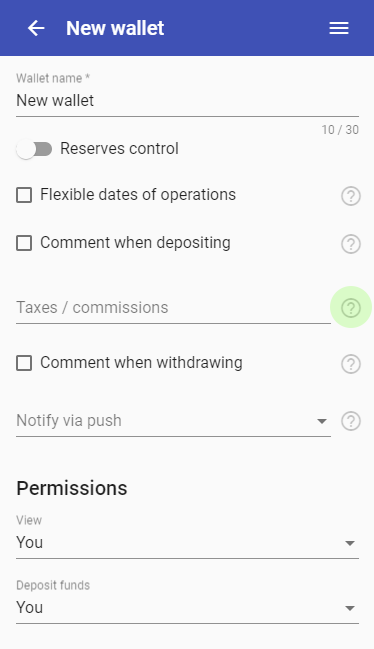
Set permissions for your colleagues to access and edit data in the wallet:
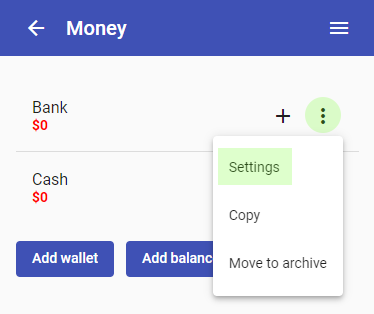
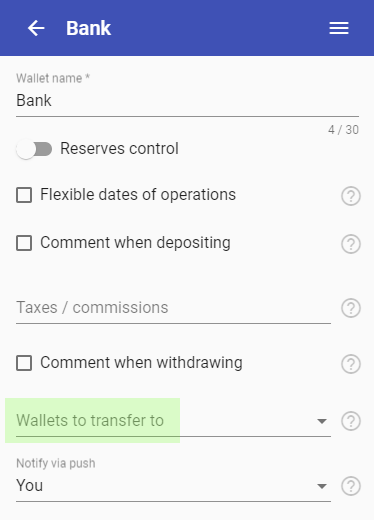
After creating all wallets, you can configure transfers between them. For example, you want to be able to transfer funds from bank account wallet to cash wallet. So open your bank account wallet settings...
... and fill out the option "Wallets to transfer to":
You may also summarize several wallets totals by creating a "balance". To do that, please, press the "Add balance" button under the list of your wallets:

Step 4. Configure Inventory
Inventory tool can be used to store your price lists and warehouse stock data. You can create separate "lists" for a warehouse ("products" list) and a price list ("services" list). The difference is that "products" have a stock and a cost price, while "services" do not.
Proceed to the Inventory menu section and press "Add list" button:

If you want to use warehouse items cost price accounting, you should define at least one wallet in "Use wallets" field:

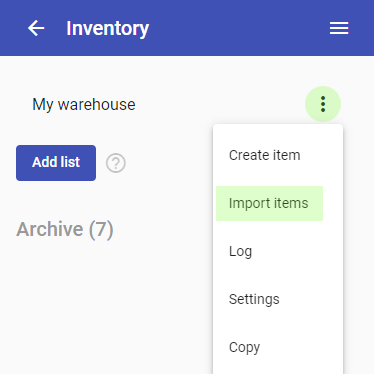
You can import your stock or price list data using "Import items" section in the list actions menu:
Step 5. Configure Docs
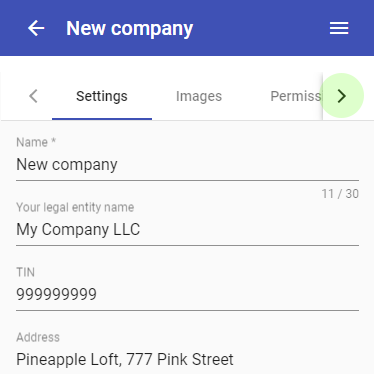
In Upp documents are stored inside "companies". If you have only one legal entity, set up one company.
Navigate to the Docs section in the main menu and press "Add company" button.
Company settings are grouped in tabs:
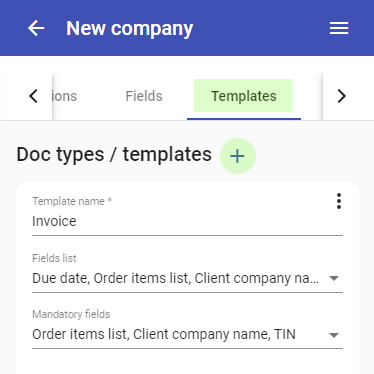
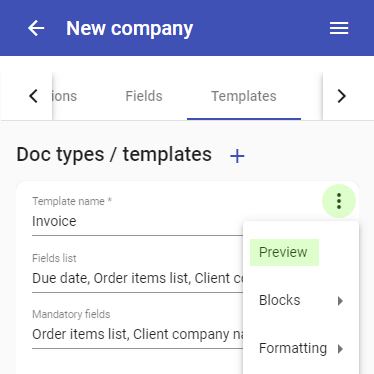
To be able to create documents of various types (for example, invoice, contract, estimate), you should set up "templates". Each template represents specific document type. Open "Templates" tab and add a template by pressing "plus" button:
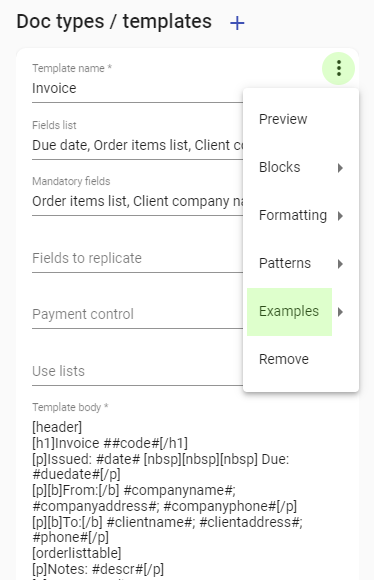
Configuring a template can be a bit challenging, so you can use examples in template actions menu:
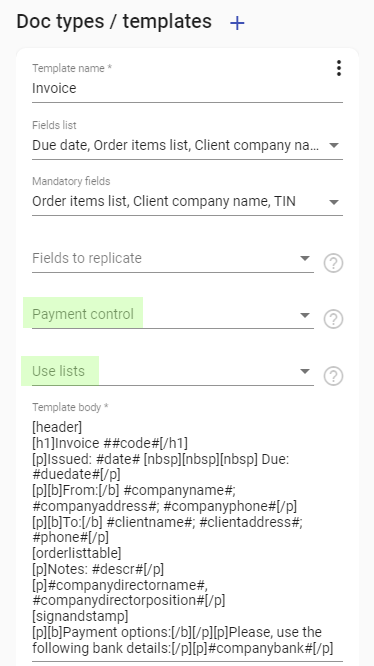
If you use "Order items list" field in template fields list, you'll be able to set "Payment control" and "Use lists" fields. "Payment control" allows you to mark invoices as paid. If you define some "lists" (from Inventory section) in "Use lists" field, these lists items will be shown in suggestions when filling "Order items list" of a document.
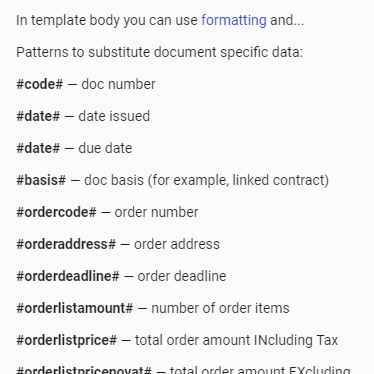
The "Template body" uses formatting tags for text markup and styling (for example, [b]...[/b] means bold text) and special "patterns" for document data substitution (for instance, #date# pattern means document issue date). The list of available patterns can be found under the templates list:
You can preview the template by pressing corresponding button in template actions menu:
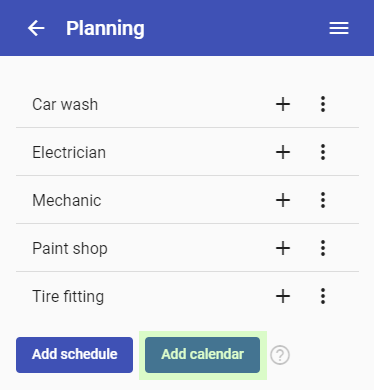
Step 6. Configure Planning
Proceed to the Planning menu section and press "Add schedule" button. If you want your customers to make bookings online, please, turn on the "Enable self-registration" switch:
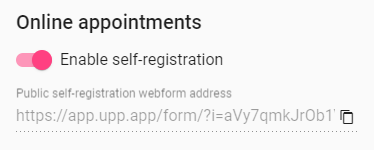
Then you'll get a link which you can publish on your website or elsewhere.
You can also group several schedules in one "calendar" to view the whole workload of your business. Press "Add calendar" button under the list of your schedules:
Step 7. Set up Orders
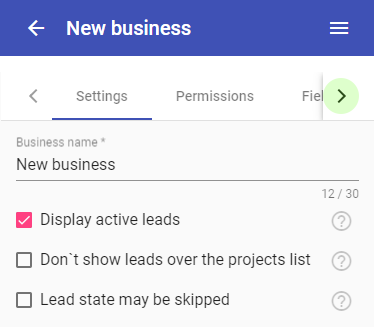
Now it's time to create a "business" to store your deals and clients.
Open Orders section in the main menu and press "Add business" button.
Use tabs to navigate through the "business" settings:
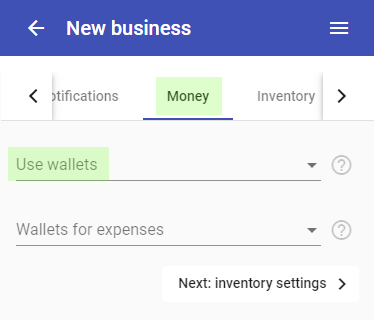
In the "Money" tab you can choose wallets to be used for deals payments and expenses:
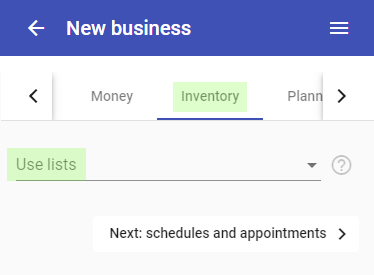
In "Inventory" tab you can link some "lists" from Upp Inventory tool to be used in your deals:
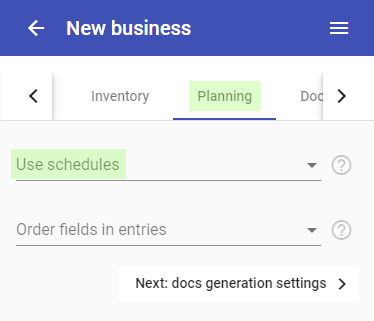
Define the list of schedules to add your deals to in the "Planning" tab:
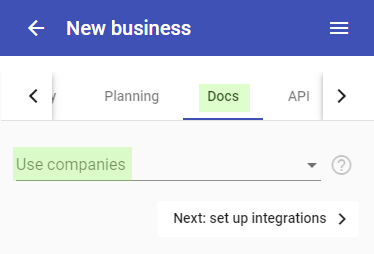
And finally select companies to issue documents within your deals in "Docs" tab:
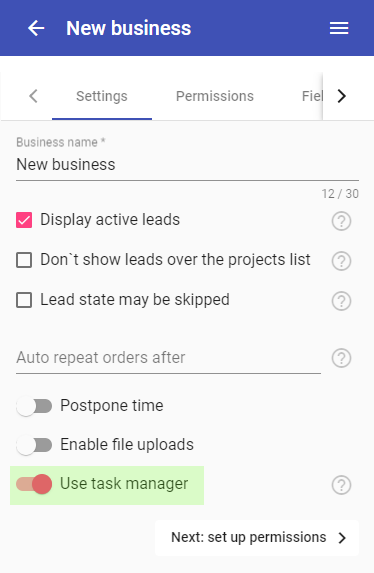
You may also turn on the "Use task manager" switch in the first "Settings" tab to be able to create tasks and memos within your deals:
How do Upp tools work together
Linking your Upp tools as described in this manual makes your data management more efficient and centralized.
As a rule, everything is made within the deal:
- You can add your products from Inventory to your order items list
- You can capture payments and expenses (Money)
- You can update your stock (Inventory) directly from the deal management interface
- You can add your deal to schedules (Planning)
- You can issue various documents related to a deal (Docs)
- You can create memos and tasks related to a deal (Tasks)
You may also take a look at this article